Wood finishing is not just an aesthetic choice; it plays a crucial role in the longevity and durability of wooden pieces. When you finish wood, you are essentially creating a protective barrier that shields it from moisture, dirt, and wear. This is particularly important for furniture and items that will be exposed to the elements or frequent use.
A well-finished piece not only looks beautiful but also resists damage from scratches and stains, ensuring that your hard work remains intact for years to come. Moreover, finishing enhances the natural beauty of the wood grain, bringing out colors and patterns that might otherwise go unnoticed. It can transform a simple piece of lumber into a stunning work of art.
Whether you’re crafting a dining table or a decorative shelf, the right finish can elevate your project, making it more appealing and valuable. Understanding the importance of wood finishing is the first step in ensuring that your woodworking projects stand the test of time while showcasing the unique characteristics of the wood you’ve chosen.
Key Takeaways
- Wood finishing is important for protecting and enhancing the natural beauty of wood
- The right wood for finishing depends on the desired look and the project’s intended use
- Properly preparing the wood surface is crucial for a successful finish
- Selecting the appropriate wood finish depends on the type of wood and the desired outcome
- Applying stain, sealant, and wood conditioner are essential steps for achieving an even and professional finish
Choosing the Right Wood for Finishing
Selecting the right type of wood is fundamental to achieving a successful finish. Different species of wood have varying densities, grain patterns, and porosities, all of which affect how they absorb stains and finishes. For instance, hardwoods like oak and maple tend to take stain well and provide a rich, deep color, while softer woods like pine may absorb finishes unevenly, leading to blotchy results.
Therefore, it’s essential to consider the characteristics of the wood you’re working with before diving into the finishing process.
If you’re crafting an outdoor piece, you’ll want to select a wood that is naturally resistant to moisture and decay, such as cedar or redwood.
On the other hand, if you’re working on indoor furniture, you might opt for a hardwood that can withstand daily wear and tear. By understanding the properties of different woods and their suitability for finishing, you can make informed decisions that will enhance both the appearance and durability of your finished project.
Preparing the Wood Surface for Finishing

Preparation is key when it comes to finishing wood. A well-prepared surface ensures that the finish adheres properly and results in a smooth, even application. Start by sanding the wood with progressively finer grits of sandpaper, beginning with a coarser grit to remove any rough spots or imperfections.
This process not only smooths the surface but also opens up the wood’s pores, allowing it to absorb the finish more effectively. After sanding, it’s crucial to clean the surface thoroughly. Dust and debris left on the wood can lead to an uneven finish or even cause defects like bubbles or streaks.
Use a tack cloth or a damp rag to wipe down the surface, ensuring that all particles are removed. If you’re working with reclaimed wood or pieces that have been previously finished, additional steps may be necessary, such as stripping old finishes or filling in cracks and holes. Taking the time to prepare your wood properly will pay off in the final appearance of your project.
Selecting the Appropriate Wood Finish
With so many options available, choosing the right wood finish can feel overwhelming. The type of finish you select will depend on several factors, including the desired look, durability requirements, and ease of application. Common finishes include oil-based stains, water-based stains, varnishes, lacquers, and polyurethane.
Each has its own unique properties and benefits. For example, oil-based finishes tend to penetrate deeply into the wood, providing a rich color and a durable surface that can withstand heavy use. However, they often take longer to dry and emit strong fumes during application.
On the other hand, water-based finishes dry quickly and are easier to clean up but may not provide the same depth of color as their oil-based counterparts. Consider your project’s specific needs and your personal preferences when selecting a finish; this decision will significantly impact both the look and longevity of your work.
Applying Stain to Wood
Staining wood is an excellent way to enhance its natural beauty while adding color. When applying stain, it’s essential to work in manageable sections to ensure even coverage. Start by using a brush or cloth to apply the stain generously, allowing it to penetrate the wood for a few minutes before wiping off any excess with a clean cloth.
This technique helps achieve a uniform color while preventing blotchiness. It’s also wise to test your stain on a scrap piece of wood or an inconspicuous area before committing to your entire project. This allows you to see how the wood reacts with the stain and make adjustments if necessary.
Remember that different woods will absorb stain differently; for instance, oak may take on a darker hue than pine. By taking these precautions and applying stain thoughtfully, you can achieve a beautiful finish that highlights the unique characteristics of your chosen wood.
Applying Sealant to Wood
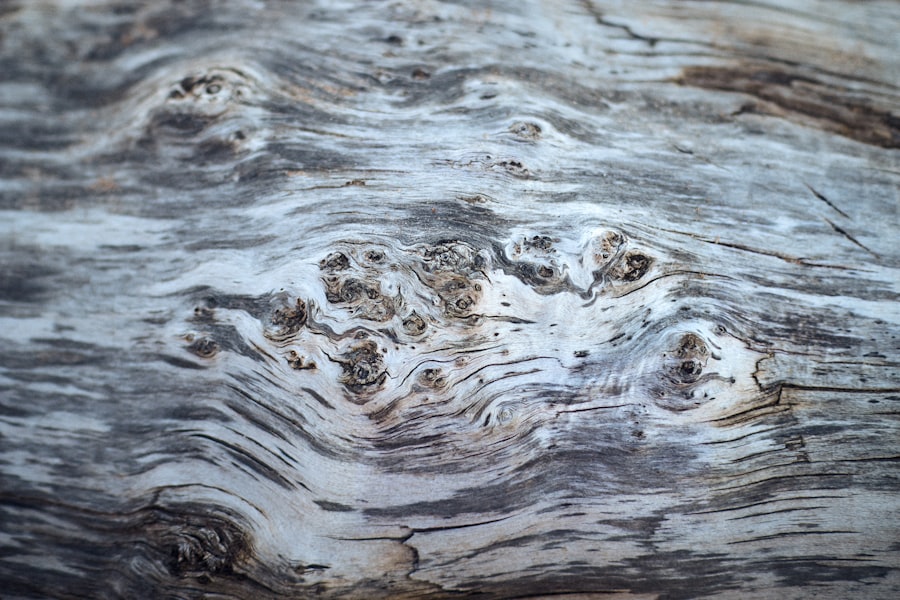
Once your stain has dried completely, it’s time to apply a sealant to protect your work from moisture and wear. Sealants create a barrier that locks in color while providing additional durability. There are various types of sealants available, including polyurethane, varnish, and lacquer, each offering different levels of protection and finishes.
When applying sealant, use a high-quality brush or foam applicator for smooth application. Start with thin coats; it’s better to apply multiple light layers than one thick coat that may lead to drips or unevenness. Allow each coat to dry thoroughly before applying the next one—this step is crucial for achieving a professional-looking finish.
Depending on your project’s requirements, you may need two to three coats of sealant for optimal protection.
Using Wood Conditioner for Even Finishing
Wood conditioner is an often-overlooked step in the finishing process that can make a significant difference in achieving an even finish. This product is particularly beneficial when working with softwoods or woods with varying densities, as it helps prevent blotchiness during staining. By applying a wood conditioner before staining, you ensure that the wood absorbs color uniformly.
To use wood conditioner effectively, apply it generously with a brush or cloth and allow it to penetrate for about 15 minutes before wiping off any excess. Afterward, proceed with staining as usual. You’ll likely notice that the stain goes on more evenly and enhances the overall appearance of your project.
Incorporating this step into your finishing routine can save you time and frustration while delivering stunning results.
Techniques for Applying Wood Finish
There are several techniques for applying wood finish that can help you achieve professional results. One popular method is using a brush; this allows for precise application in corners and detailed areas. However, brushes can sometimes leave streaks if not used carefully.
To avoid this issue, use long strokes in the direction of the grain and avoid over-brushing. Another effective technique is using a foam applicator or cloth for larger surfaces. These tools can help distribute finish evenly without leaving brush marks behind.
Whichever method you choose, always remember to work in thin layers and allow adequate drying time between coats. Experimenting with different application techniques will help you find what works best for your style and project needs.
Sanding Between Wood Finish Coats
Sanding between coats of finish is an essential step that many novice woodworkers overlook. This process helps create a smooth surface by removing any imperfections or dust particles that may have settled during drying. Use fine-grit sandpaper (around 220 grit) for this task; it’s gentle enough not to damage previous layers while effectively smoothing out any rough spots.
After sanding, be sure to clean off any dust before applying additional coats of finish.
By incorporating sanding between coats into your finishing routine, you’ll achieve a more polished look that enhances the overall quality of your work.
Buffing and Polishing Wood Finish
Once your final coat has dried completely, buffing and polishing can elevate your finished piece even further. This step adds luster and depth to the finish while removing any minor imperfections that may have occurred during application. Use a soft cloth or buffing pad to gently rub the surface in circular motions; this will help bring out the shine without damaging the finish.
For added shine, consider using a polishing compound specifically designed for wood finishes. Apply a small amount to your cloth or pad and work it into the surface until you achieve your desired level of glossiness. Buffing not only enhances appearance but also helps protect against scratches by creating a smoother surface that is less prone to damage.
Maintaining and Caring for Finished Wood Pieces
Proper maintenance is key to preserving the beauty and integrity of your finished wood pieces over time. Regular cleaning is essential; use a soft cloth dampened with water or a gentle cleaner specifically formulated for wood surfaces. Avoid harsh chemicals or abrasive materials that could damage the finish.
Additionally, consider applying a fresh coat of sealant every few years to maintain protection against wear and moisture. This proactive approach will help keep your furniture looking its best while extending its lifespan significantly. By taking these simple steps in caring for your finished wood pieces, you’ll ensure they remain beautiful additions to your home for many years to come.
In conclusion, mastering wood finishing involves understanding its importance, selecting appropriate materials, preparing surfaces meticulously, applying techniques skillfully, and maintaining finished pieces diligently. With practice and patience, anyone can achieve stunning results that showcase their craftsmanship while protecting their work for future enjoyment.
If you are interested in learning more about wood finishing techniques, you may want to check out the article “Top 10 Must-Have Woodworking Tools for Beginners” on Woodworkers Haven. This article provides valuable information on essential tools that every beginner woodworker should have in their workshop to successfully complete woodworking projects. By combining the knowledge from both articles, you will be well-equipped to start your woodworking journey with confidence.
FAQs
What are some basic wood finishing techniques for beginners?
Some basic wood finishing techniques for beginners include sanding the wood surface, applying a wood conditioner, staining the wood, and applying a clear finish such as varnish or polyurethane.
Why is sanding important in wood finishing?
Sanding is important in wood finishing as it helps to smooth out the wood surface, remove any imperfections, and prepare the wood for staining and finishing. It also helps the wood to absorb the stain and finish more evenly.
What is a wood conditioner and why is it used in wood finishing?
A wood conditioner is a pre-stain treatment that helps to even out the absorption of stain on the wood surface. It is especially useful for softwoods and helps to prevent blotchiness and uneven staining.
What are some common types of wood finishes for beginners?
Some common types of wood finishes for beginners include varnish, polyurethane, shellac, and lacquer. These finishes provide protection and enhance the natural beauty of the wood.
How should beginners apply wood stain?
Beginners should apply wood stain using a brush, cloth, or foam applicator in the direction of the wood grain. It is important to apply the stain evenly and wipe off any excess to achieve the desired color.
What are some tips for beginners to achieve a professional-looking wood finish?
Some tips for beginners to achieve a professional-looking wood finish include properly preparing the wood surface, applying thin and even coats of finish, and allowing sufficient drying time between coats. It is also important to sand between coats for a smooth finish.